Showing posts with label tape. Show all posts

Thursday, June 5, 2014

Wedding Season Nails

Hey there, nail enthusiasts of the net! I have some fun ones today. It's wedding season, and with that it meant it was time to get a new dress. Of course whenever I go shopping for a dress I take into consideration the kind of nail art I can do to accessorize, and I found such a fun dress to inspire my art.
My cousin got married this past Sunday and I did a mani-pedi to go along with my dress:

(I'm the one on the right)

I snapped some pictures quickly while waiting for the ceremony to start, so these are not the best of pictures (and I proceeded to pick of the paint the next day- bad habit, I know), but they turned out pretty great!


Pretty fun, right?

It's a good thing I like my pedicure, since I'm probably going to be keeping it for quite some time.

I have bad news.

I dislocated my right shoulder yesterday and the doctor I saw thinks I tore a ligament or cartilage. I'll find out in a few days when I see the orthopedic specialist. Either way, My dominant arm is down for the count for at least a few weeks. I guess I can work on using my non-dominant hand in the meantime, but unfortunately I won't be able to do any nail art (or anything else I like to do for that matter) for quite some time. You have no idea how frustrated I am about that. But I will try to post sometime in the next month.

Until then-
Happy Painting!

Friday, March 7, 2014

Pinspiration Challenge Day 3: Geometric

I'm excited about this one, you guys! My nails turned out really well for today's challenge!

It was hard not to just do my own thing for this on since I love color blocking, but I found a cool pin to take inspiration from here. This is by a French blogger, it seems: La Paillette Frondeuse. Here's the original pin:


And here is my interpretation:


I added some more stripes and changed the colors to match my wardrobe this weekend. I love them! I'll be sad to take them off.

Happy Painting!


Tuesday, March 4, 2014

Pinspiration Challenge Day 2: Stripes

Day two of the challenge is upon us! I decided to give my fingers a break and give myself a pedi for stripe day. The pin that inspired me is actually the first pin I pinned to my nail art board! This is the original pin credited to pshiiit.com:


And as you'll see, besides making this a pedicure, I also changed the colors to pastels, and changed the number of stripes.


I got impatient and put on striping tape before the base was dry, which actually hasn't happened to me yet, so I unfortunately had some leaking.


I like them, though! I'm glad I finally got around to trying this design out. I mean, that is the point of the challenge after all...

See you on Friday for the Geometric challenge!

Happy Painting!


Monday, February 10, 2014

An earnest attempt at striping

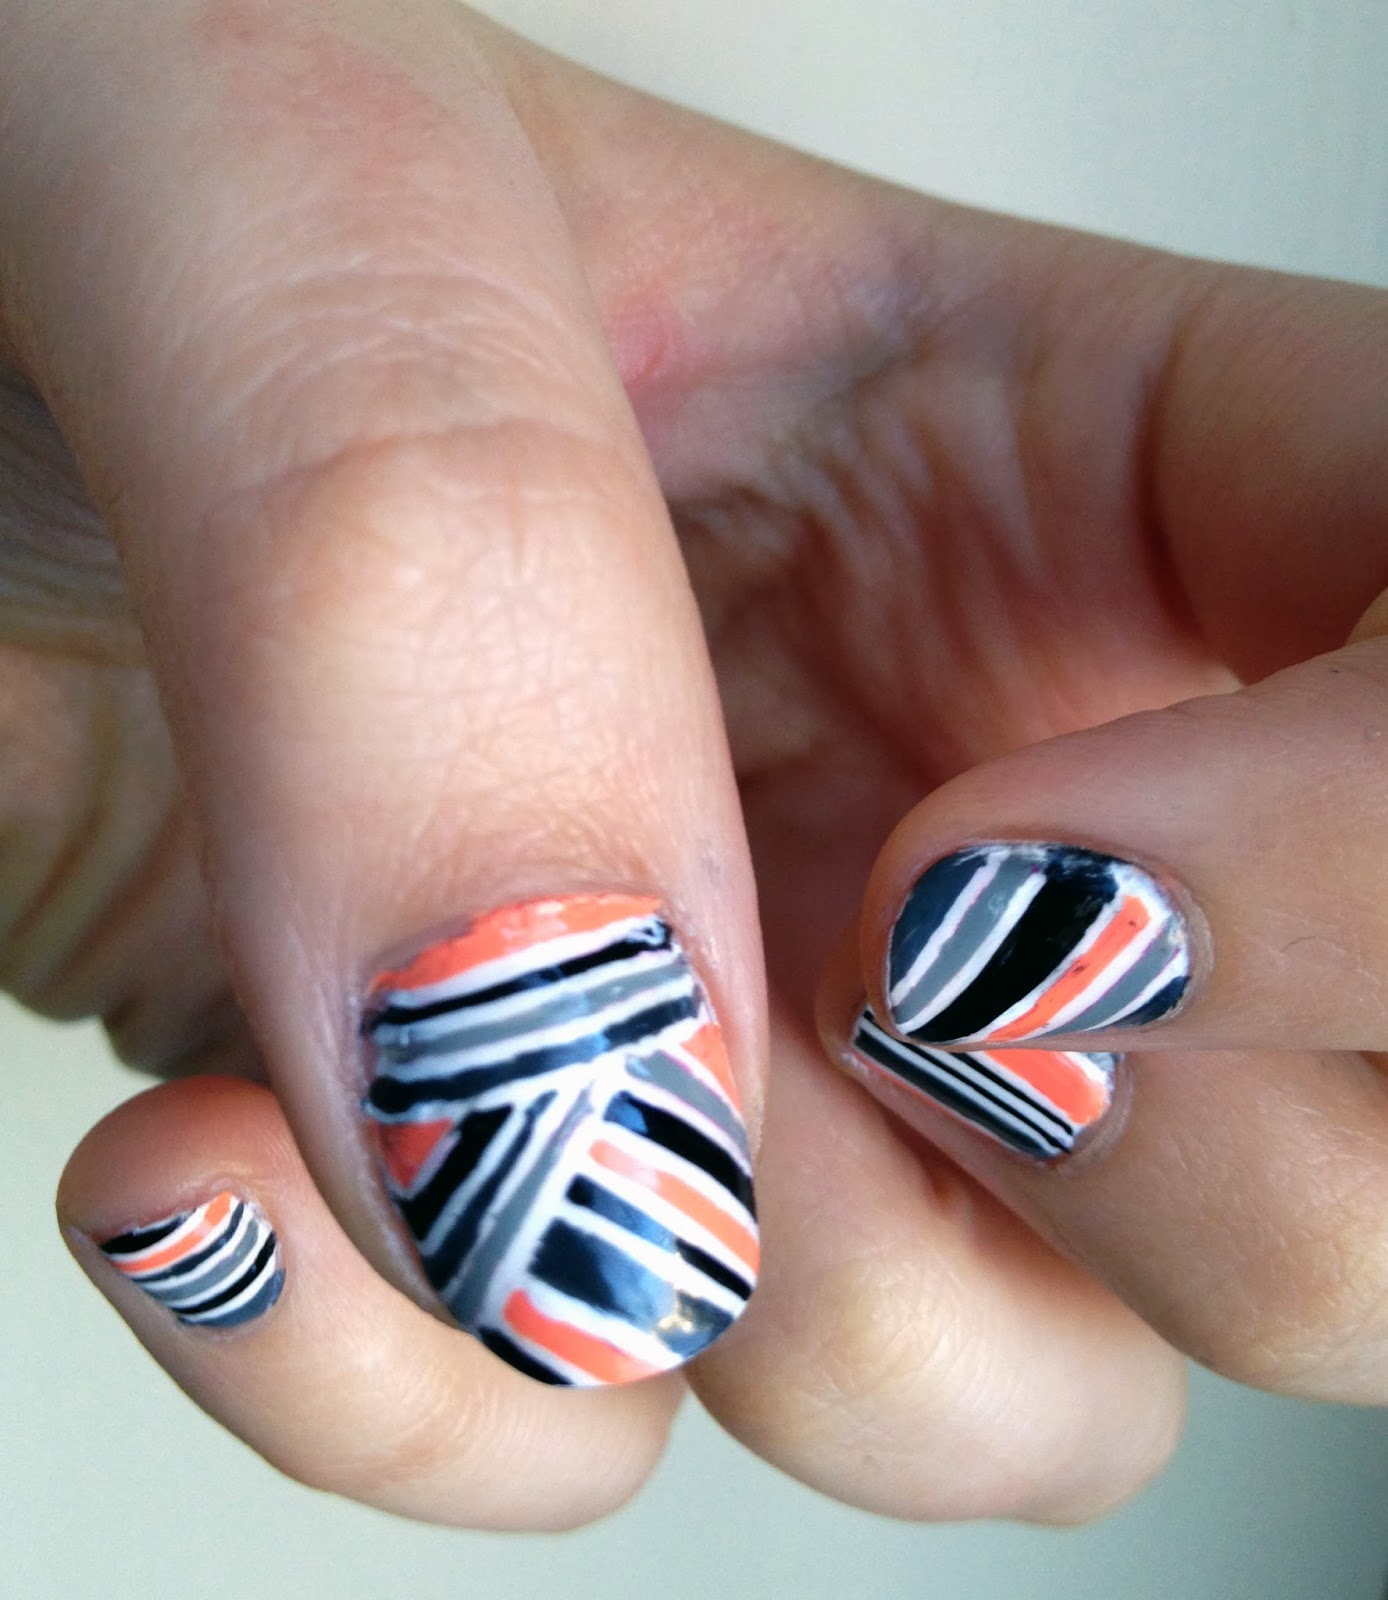
As I mentioned in my last post, I recently bought some striping tape. This weekend I decided to try it out for a manicure. It took a LOT of patience and I learned a thing or two along the way.

It's a bit tricky to tell with this lighting, but I used black, charcoal gray, light gray, peach, and white. I'm actually quite pleased with the way this turned out considering how difficult it was to apply the tape with one hand. 


Yeah, I think I ended up prepping, painting, and cleaning up for about three hours. Ridiculous, right? Well, part of that time was me being distracted by Netflix, but I've realized that in general it just takes me forever to paint. Is that true for you guys as well? Any tips to speed up the process?


Stay tuned for an exciting announcement next week! Until then...

Happy Painting!


Thursday, August 15, 2013

30 Day Challenge: Gradient (with step by step instructions)


Well, this is the second time I've ever done a sponge gradient. My first time was a bit splotchy, and while everyone says it's an easy process, I still messed up more than I wanted to. So for today's mani I decided to do a step by step with some tips and tricks. Granted, it's still not the best gradient you've ever seen, I'm sure, but it's much better this time. And I really like the colors! So let's get started:

Step 1: Pick your colors/gather your materials


For my basecoat, I used NYC In a NY Minute. This is pretty great if you only want to keep your mani for a day or two, as your polish will literally pop right off after 24-48 hours. But, as the name implies, it only take a minute to dry.
Originally I planned on just using the Sally Hansen Lickety-Split Lime and China Glaze Shower Together, but decided to add the navy last minute. It was a good choice, as it added more depth to the gradient. And finally, I topped it off with everyone's favorite top coat- Seche Vite. 

Step 2: Apply as base color


Other tutorials recommend using the lightest color for your base, which is wise. It's hard enough to build up the dark colors on top of light, so I imagine unless you're using white on a dark color, stick with the light color as a base.

Now you have to be patient and let the color dry completely so it doesn't smudge when you start sponging. Like, REALLY let it dry. In the meantime you can get tape ready to protect your fingers since sponging gets pretty messy. I only taped my left hand, and yes, while it's annoying to tape every finger, it really does speed up the clean up process.

Step 3: Cut your sponge into a shape slightly smaller than your nail and prep your colors.


Do NOT use a sponge like the one pictured above! It will not work well, trust me. That is, unless you're really into getting strands of fibers stuck in your polish. Get a good blob of paint down on foil (I prefer foil over plastic) and put your colors close so that they overlap. You can use two at a time or three. I found two to be easier for building up the colors. Make sure you add the color you chose for your base, otherwise it will not blend very well. Then let the sponge soak up all the paint, and quickly dab it over your nail. I'd go up and down and to the sides to get a good blend. You'll have to do this a few times if you want the paint to be true to color. It goes relatively fast, however. 

Step 4: Continue sponging with additional colors


This is what it looked like with two colors. I had wanted more of a transition to a blue hue, but the bright lime made my shower together look more green, so I decided to add navy. 


(Also, use a sponge like the one shown in the picture above) So after a little trial and error, I found that pairing up the second and third color is easier than trying to use all three at once.  And although it's not pictured here, I'd recommend using your top coat as soon as you've finished each finger, since it will help it blend the colors even more (my right hand is more blended, but I didn't take pictures of that hand...so imagine this one, but better).

Step 5: Topcoat and clean up


Once you take off the tape you'll see how much time you saved on cleaning up the mess! Or maybe I'm just a messy painter...no, I definitely am, but considering the nature of sponging, it's pretty hard to not get it all over your fingers. 

Step 6: Marvel at the final result


Besides my pinky, which got messed up from using the wrong sponge, I think this looks pretty cool. It definitely looks awesome at a distance. Actually, you can see the gradient much better from a distance, and it looks pretty smooth. Not too shabby for my second attempt. And I love the colors, it's great for summer.

Do you have any tips on using the sponging technique? If so, share them in the comment section.

Happy painting!

P.S. Do you agree that the pictures look much better with the lightbox I built last week? I think it has really enhanced the quality.


Saturday, November 24, 2012

Give Thanks for Paint

Over the holiday I offered to paint a few family members' nails. My cousins searched my pinterest nail art board and picked two designs they liked. I hadn't tried either of the designs, but thought it would be a nice challenge and they both seemed pretty realistic to do in an hour (I have slow hands).

First up, my lovely cousin-in-law Lyssa's design:

The color accuracy and photo quality aren't the greatest, but this is pretty close to how they looked. This was my first time using tape to get straight lines. I only taped the middle triangle section and hand painted everything else. I think it turned out pretty well and I can definitely see the advantage of taping but I think I'll try to find thin strips of tape so I can have better lines. I used 3 China Glaze paints- Lemon Fizz, Peachy Keen (it's less orange in person), and Shower Together. The color combination is pretty pleasing. This was my first time painting someone else's fingers in a LONG time. It was rather enjoyable.

This morning before we left I quick did my cousin Hannah's toes with this gradient stripe design. It's different from the inspiration photo (which is angled, all one color family, and has much straighter lines), but considering I did it in a rush and entirely freehand, I think it turned out really well.
Again, I apologize for the photo quality/color

Hannah seemed to like the end result, and this design is really perfect for her, given her love for the ocean. I did realize while doing this that I could really use some new tools. If you have advice for brushes or other tools that hold paint well and can do striping and very intricate details, please leave a comment. 

It was really a pleasure to do these designs this weekend! I'll have to find more people back home that would like a free manicure/pedicure, since it's really great practice for me and I find it really relaxing and fun.